

Tired of Kitchen Chaos?
A cluttered kitchen drains the joy from cooking. This listicle provides 10 practical solutions to reclaim your kitchen space and make cooking enjoyable again. Discover how to declutter, organize, and optimize your kitchen, whether you're in a small apartment or simply overwhelmed by stuff. Learn about the KonMari Method, zone-based organization, vertical storage, and more. Implement these strategies to create the efficient and organized kitchen you deserve.
1. Konmari Method for Kitchens
Tired of cluttered countertops and overflowing drawers? The KonMari Method, developed by organizing consultant Marie Kondo, offers a unique and effective approach to decluttering your kitchen, focusing on keeping only the items that truly "spark joy." This method encourages a mindful evaluation of every single item in your kitchen, resulting in a space that is not only organized but also emotionally satisfying. Instead of focusing on what to discard, the KonMari Method emphasizes choosing what to keep—specifically, those items that bring you happiness or genuinely serve a purpose.

This method works by categorizing your kitchen belongings (cookware, utensils, appliances, pantry items, etc.) and then examining each item within that category. Hold it in your hands, consider its usefulness and its emotional significance, and ask yourself: Does this spark joy? If the answer is no, thank the item for its service and let it go. This process encourages a deeper connection with your possessions and helps you identify what truly adds value to your life and your kitchen.
The KonMari Method’s emphasis on category-based organization, mindful evaluation, vertical storage, and visibility makes it a highly effective, albeit potentially time-consuming, decluttering solution. It’s a particularly suitable choice for urban residents, people moving, those struggling with clutter, or individuals living in small apartments where optimizing space is crucial. By focusing on what you love and use, you'll create a more functional and enjoyable kitchen environment.
Examples of Successful Implementation:
- Utensil Drawer Transformation: Instead of a jumbled mess, utensils are arranged vertically in dividers, making them easily accessible and visually appealing.
- Unified Food Storage: Mismatched containers are replaced with a uniform set, creating a streamlined and organized pantry or cupboard.
- Categorized Drawers: Drawer dividers separate categories like baking tools, cooking utensils, and cutlery, minimizing clutter and making it easy to find what you need.
Actionable Tips:
- Start Small: Begin with an easy category like duplicate kitchen gadgets or expired pantry items to gain momentum.
- Utilize Organizers: Drawer dividers, box organizers, and shelf risers maximize vertical space and keep items categorized.
- Group Similar Items: Store like items together (e.g., all baking supplies in one area) for improved efficiency.
- Vertical Folding: Fold linens like dish towels and place them vertically in drawers, similar to filing clothes, for easy access and visibility.
- Clear Countertops: Keep countertops mostly clear, storing only frequently used appliances and decorative items.
Pros:
- Lasting Change: The KonMari Method fosters mindful consumption and helps prevent future clutter accumulation.
- Reduced Decision Fatigue: By establishing clear criteria for what to keep, you’ll streamline future organizing decisions.
- Increased Functionality: A decluttered kitchen is a more functional kitchen.
- Emotional Satisfaction: The process can be surprisingly therapeutic and emotionally rewarding.
Cons:
- Time Investment: The initial decluttering process can be time-consuming, requiring dedicated effort.
- Potential Waste: Some may find it difficult to discard functional items, even if they don't spark joy.
- Challenges in Shared Kitchens: Implementing the method can be challenging in shared kitchens with varying preferences.
- Difficulty for Sentimental Individuals: Those with strong sentimental attachments may find the process difficult.
The KonMari Method earns its place on this list because it offers more than just a quick fix. It provides a framework for creating a lasting change in your kitchen and your relationship with your belongings. By focusing on joy and functionality, you create a kitchen that is not only organized but also a more pleasant and inspiring space to cook and spend time in. While the initial process might seem daunting, the long-term benefits of a truly joyful and functional kitchen are well worth the effort. For more information, check out Marie Kondo's book, "The Life-Changing Magic of Tidying Up," or her Netflix series, "Tidying Up with Marie Kondo."
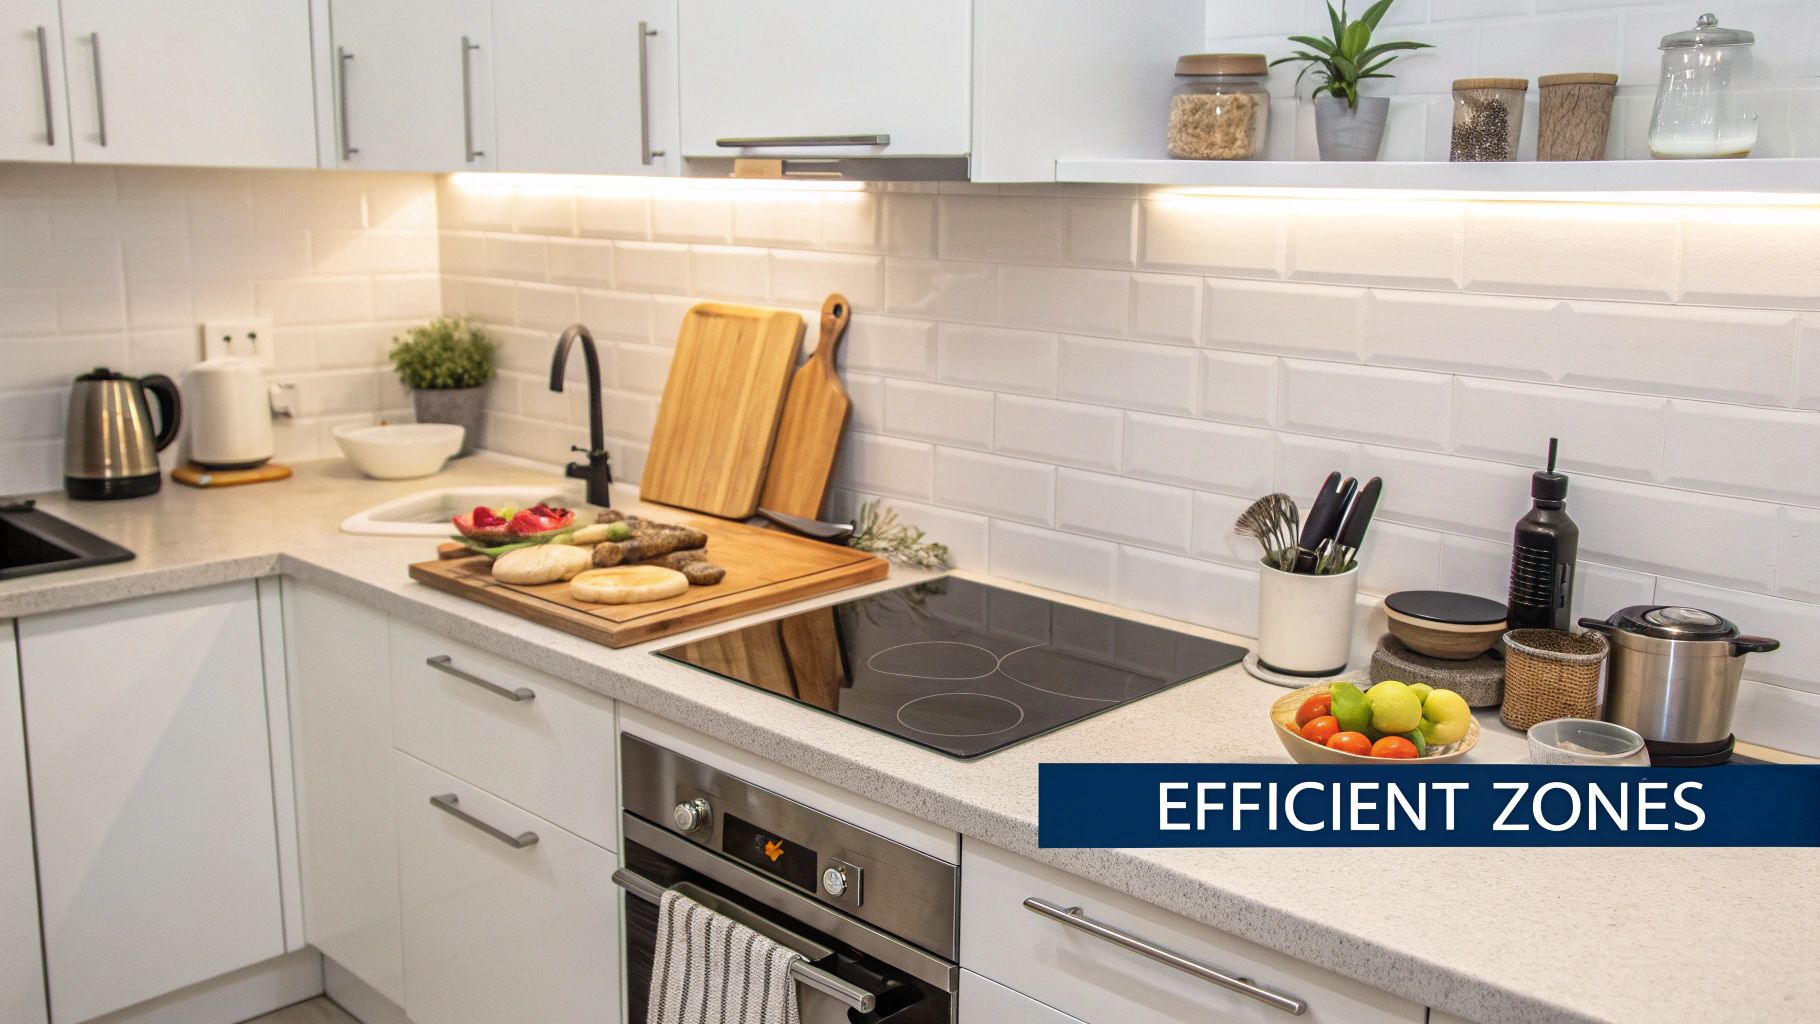
2. Zone-Based Kitchen Organization
Zone-based kitchen organization, inspired by commercial kitchen design, transforms your kitchen into a well-oiled machine. This method divides your kitchen into specific activity zones: prepping, cooking, cleaning, and storage. Each item then finds a home within its designated zone, minimizing unnecessary movement and maximizing efficiency during meal preparation. This means less time running back and forth across your kitchen and more time enjoying the cooking process.
This approach is particularly beneficial for urban residents, people moving into new homes, those struggling with kitchen clutter, and individuals living in small apartments. It leverages ergonomic principles, placing frequently used items within easy reach and significantly reducing the walking distance required during cooking tasks. For example, imagine a prep zone near the sink with cutting boards, knives, and peelers readily available. Your cooking zone would center around the stove, housing pots, pans, and essential utensils. A dedicated coffee station could gather beans, a grinder, and mugs in one convenient corner. Creating designated zones in your kitchen for specific tasks like prepping, cooking, and baking can significantly improve workflow and reduce clutter. For more in-depth strategies on maximizing space and functionality, check out these smart kitchen organization ideas.
This system is highly adaptable to different kitchen sizes and cooking styles. While it offers significant advantages in terms of efficiency and enjoyment, there are a few potential drawbacks to consider. Implementing a zone-based system requires an initial investment of planning time and may involve minor modifications to your existing layout. It can also be a challenge in exceptionally small kitchens where space is extremely limited. Furthermore, the focus on functionality might occasionally clash with aesthetic preferences.
Tips for Implementing Zone-Based Organization:
- Map it Out: Before you start rearranging, sketch your kitchen layout on paper. This helps visualize the zones and optimize item placement.
- Point of Use Storage: Store items where you actually use them. Keep spices near the stove, mixing bowls near the prep area, and dish soap by the sink.
- Personalize Your Zones: Design zones based on your cooking habits. A frequent baker might prioritize a dedicated baking zone, while someone who primarily reheats meals might need a larger storage area.
- Vertical Space: Maximize vertical space within each zone using shelves, drawer organizers, and hanging racks.
- Cleaning Zone Central: Keep all cleaning supplies near the sink for easy access and quick cleanups.
Pros:
- Increased kitchen efficiency
- Makes cooking more enjoyable
- Functional for all kitchen sizes (with planning)
- Easy to maintain once established
- Creates intuitive organization
Cons:
- May require kitchen layout modifications
- Can be challenging in very small kitchens
- Requires initial planning time
- May conflict with aesthetic preferences
By carefully considering your cooking habits and applying these tips, you can transform your kitchen into a highly efficient and enjoyable workspace using zone-based organization.
3. Decluttering by Frequency of Use
This method, often championed by professional organizers and minimalism experts like Peter Walsh, tackles kitchen clutter by prioritizing accessibility based on how often you use your kitchen items. It establishes a hierarchy of storage locations, placing everyday essentials within easy reach and relegating less frequently used items to secondary storage. This focus on practicality streamlines your daily cooking routine and reduces visual clutter, making your kitchen a more enjoyable and efficient space. This approach is particularly valuable for urban residents, people moving, those struggling with clutter, and individuals living in small apartments where maximizing space and efficiency is crucial.
How it Works:
The core principle is simple: items you use daily, like your favorite coffee mug or your go-to cutting board, should occupy prime real estate – easily accessible shelves and countertops. Weekly-use items, such as a specific pan for Sunday brunch or your food processor, can be stored in slightly less convenient locations. Rarely used appliances and specialty cookware, like that fondue set or ice cream maker, belong in higher cabinets, deeper drawers, or even in off-site storage like the basement or garage. This creates a streamlined kitchen environment where everything you need regularly is readily available.
Examples of Successful Implementation:
- Everyday dishes and cutlery: Stored in drawers and cabinets near the dishwasher for easy loading and unloading.
- Cooking utensils: Kept in a utensil holder on the counter or in a drawer near the stove.
- Weekly-use baking pans: Stored in a lower cabinet, accessible but not taking up prime space.
- Holiday serving platters: Stored in high or deep cabinets, only retrieved when needed.
- Rarely used appliances (e.g., bread maker, waffle iron): Moved to basement/garage storage or a pantry shelf.
Actionable Tips for Implementation:
- Track Usage: Before reorganizing, spend a few weeks noting how often you use each item. This provides concrete data to guide your decisions.
- The "Maybe" Box: Create a box for items you're unsure about. If you don't use anything from the box within a specific timeframe (e.g., 3-6 months), consider donating or discarding those items.
- Labeling: Clearly label storage areas for seasonal items to simplify retrieval and prevent rummaging.
- Regular Review: Review and adjust your kitchen organization every 6 months. Cooking habits change, and your storage should adapt accordingly.
- One-Year Rule: Consider donating or selling items you haven't used in over a year. Chances are, you won't miss them.
Pros and Cons:
Pros:
- Makes daily cooking significantly more efficient.
- Adapts to changing cooking habits.
- Works in any kitchen layout.
- Simplifies both cooking and cleaning processes.
- Reduces visual clutter, creating a calmer kitchen environment.
Cons:
- Requires an honest assessment of your usage patterns.
- May necessitate frequent reorganization as habits evolve.
- Can be challenging to implement with multiple cooks who have different habits, requiring compromise and communication.
Why This Method Deserves a Spot on the List:
Decluttering by frequency of use is a practical, highly effective method for tackling kitchen clutter. It goes beyond simple tidying by addressing the root of the problem: inefficient organization. By prioritizing accessibility based on real-world usage, it transforms your kitchen into a functional and enjoyable space. This approach is especially beneficial for those living in smaller spaces or those looking to simplify their cooking routines. The adaptability of this method, allowing for adjustments as habits change, ensures long-term organization and efficiency in your kitchen.
4. Vertical Storage Solutions
Vertical storage is a game-changer for maximizing kitchen space, especially in smaller urban apartments or for those struggling with kitchen clutter. It leverages often-underutilized vertical surfaces like walls, cabinet doors, and even the insides of cabinets to store items upright rather than stacked. This simple shift dramatically increases visibility, prevents the dreaded avalanche of stacked containers, and makes better use of every inch of available space.

The core principle of vertical storage is to think upwards. Instead of stacking pots and pans, which hides those at the bottom and risks a clattering collapse, you store them upright on racks or hanging from hooks. Instead of piling cutting boards, you use vertical dividers or a repurposed file folder organizer to store them neatly on their sides. This approach is particularly effective in smaller kitchens where counter space is limited and cabinets are often cramped.
Examples of Vertical Storage in Action:
- Magnetic Knife Strips: A classic and effective way to free up drawer space and keep knives readily accessible.
- Pegboard Systems for Pots and Utensils: Popularized by Julia Child, pegboards provide highly customizable storage for frequently used items.
- Vertical Dividers for Bakeware and Cutting Boards: These dividers prevent stacking and make it easy to grab the item you need without having to remove everything else on top.
- Door-mounted Spice Racks: These free up valuable shelf space and keep spices organized and within reach.
- Over-the-door organizers for pantry doors: A great way to utilize otherwise wasted space and store everything from snacks to cleaning supplies.
Actionable Tips for Implementing Vertical Storage:
- Tension Rods: An inexpensive and easy way to create vertical dividers in cabinets for bakeware, cutting boards, and even lids.
- Store Sheet Pans and Cutting Boards Vertically: This prevents them from getting lost at the bottom of a pile.
- Hooks Under Cabinets: Perfect for hanging mugs, freeing up shelf space inside the cabinets.
- Magnetic Strips: Use these not just for knives, but also for metal utensils, measuring spoons, and even small spice tins.
- Over-the-door organizers: Maximize pantry and cabinet door space with these versatile organizers.
Why Vertical Storage Deserves a Spot on the List:
For urban dwellers, those downsizing, or anyone struggling with kitchen clutter, vertical storage offers a simple yet highly effective solution. Its benefits are numerous: it maximizes space, increases visibility and accessibility, reduces countertop clutter, prevents items from being forgotten in the depths of cabinets, and can even add a stylish touch to your kitchen.
Pros and Cons:
Pros:
- Maximizes storage in small kitchens
- Increases visibility of items
- Reduces countertop clutter
- Prevents items from being forgotten
- Makes items more accessible
Cons:
- Some solutions require installation (e.g., pegboards, wall-mounted racks)
- Can make the kitchen look busy if overdone
- May not be ideal for all rental properties (installation restrictions)
- Some systems (e.g., custom-built units) can be expensive
While some solutions may require installation and a bit of planning, the payoff in terms of organization and increased space is well worth the effort. Just remember to avoid overdoing it—a balanced approach is key to creating a functional and aesthetically pleasing kitchen. Consider starting with a few simple solutions like tension rods or magnetic strips and gradually incorporating more complex systems as needed.
5. The One In, One Out Rule
The One In, One Out Rule is a powerful strategy for maintaining a clutter-free kitchen and fostering mindful consumption. It operates on a simple principle: for every new kitchen item you bring into your home, an existing item must go. This creates a balanced ecosystem within your kitchen, preventing the gradual accumulation of unused gadgets, duplicate tools, and unnecessary clutter. It's a proactive approach that shifts the focus from acquisition to thoughtful curation, making it particularly useful for urban residents, people moving, those living in small apartments, or anyone struggling with kitchen clutter.
This method works by forcing you to evaluate the necessity of every new kitchen item before purchasing it. Instead of impulsively adding another specialized gadget to your overflowing drawers, you're prompted to consider: "What will I remove to make space for this?" This question encourages a more discerning approach to shopping, prioritizing functionality and need over novelty and fleeting desires.
Examples of Successful Implementation:
- Replacing instead of adding: Your wooden spoons are looking worn and cracked. Instead of just buying a new set and adding to the existing collection, you discard the old ones first. This maintains a reasonable number of spoons while ensuring you have functional tools.
- Donating before upgrading: You've been eyeing a new stand mixer, but your current one, though functional, is rarely used. Before purchasing the new mixer, donate the old one to a charity or someone who will use it. This prevents having two bulky appliances taking up valuable counter or cupboard space.
- Trading up for quality: You find a high-quality chef's knife that you believe will significantly improve your cooking experience. You remove your older, lower-quality knives and donate them, making room for the upgrade without increasing the overall number of knives you own.
Actionable Tips for Implementing the One In, One Out Rule:
- Keep a donation box accessible: Having a designated box readily available makes it easy to remove items as new ones come in.
- Take inventory before shopping: Knowing what you already have prevents duplicate purchases. Check your kitchen before heading to the store for new gadgets or tools.
- Wait 24 hours before purchasing: This cooling-off period helps avoid impulse buys and gives you time to consider what you might remove to make room for the new item.
- Consider the purpose and frequency of use: Ask yourself: "How often will I realistically use this?" and "Does this serve a unique purpose that my existing tools don't already cover?"
- Share the rule with family members: For the rule to be truly effective, everyone in the household needs to be on board. Explain the benefits and encourage their participation.
Pros and Cons:
Pros:
- Maintains organization long-term: It's a sustainable approach to clutter prevention, not a one-time fix.
- Prevents thoughtless accumulation: Encourages mindful purchasing decisions.
- Creates mindfulness around purchases: Forces you to evaluate the true need for each item.
- Works with any organization system: Can be incorporated into existing organizational strategies.
- Cost-effective: By reducing impulse buys, it saves money in the long run.
Cons:
- Requires discipline: Sticking to the rule requires consistent effort and commitment.
- May feel restrictive: It can feel challenging initially, especially for those accustomed to frequent purchases.
- Difficult to implement with multiple household members: Requires buy-in and cooperation from everyone in the home.
- Doesn't address existing clutter: This rule is a preventative measure, not a decluttering solution. You'll need to address existing clutter separately before implementing this rule effectively.
This rule deserves a place on this list because it provides a long-term, sustainable solution to kitchen clutter, fostering a more mindful approach to consumption. It empowers individuals, especially those in smaller living spaces, to curate a kitchen filled with truly useful and valued items, rather than one overflowing with unused gadgets and duplicate tools. While it requires discipline, the benefits of a consistently organized and clutter-free kitchen make the effort worthwhile. Popularized by minimalist advocates like Joshua Becker of Becoming Minimalist and The Minimalists (Joshua Fields Millburn and Ryan Nicodemus), this simple rule can transform your kitchen from a chaotic space into a functional and enjoyable heart of your home.
6. Clear Container Standardization
Reclaim your kitchen cabinets and pantry from chaotic clutter with the power of clear container standardization. This organizational method involves replacing a mismatched assortment of food storage containers with a unified set of stackable, and ideally, clear containers. This seemingly simple swap transforms your storage spaces from a jumbled mess to an organized and efficient system. By using uniform containers, not only do your shelves look tidier, but you also maximize space and gain clear visibility of your pantry and fridge contents. This visual clarity streamlines meal prep, reduces food waste (no more forgotten leftovers hiding in opaque containers!), and prevents redundant grocery shopping.

This approach is particularly beneficial for urban residents, those moving to a new home, individuals struggling with kitchen clutter, and anyone living in a small apartment where maximizing space is crucial. Clear container standardization earns its place on this list because it addresses several key clutter problems simultaneously: disorganization, wasted space, and difficulty locating items. Specific features like stackable designs, modular sizes, and air-tight seals further enhance functionality and preserve food freshness.
Examples of Successful Implementation:
- Dry Goods: OXO POP containers are a popular choice for storing dry goods like flour, sugar, and cereals. Their airtight seals keep food fresh, and the modular design maximizes shelf space.
- Leftovers: Matching glass containers with secure lids are ideal for storing leftovers, allowing quick identification and easy reheating.
- Spice Organization: Standardized spice jars with clear labels create a cohesive and functional spice rack.
- Pantry Staples: Uniform pantry containers with measurement markings make it easy to see how much of a staple ingredient remains.
Actionable Tips for Implementation:
- Start Small: Begin with one category of items, such as leftovers or baking supplies, to avoid feeling overwhelmed.
- Nesting Feature: Choose containers that nest inside each other when empty to save space when not in use.
- Labeling: Clearly label containers with contents and expiration dates to further streamline organization and prevent food waste.
- Shape Matters: Opt for square or rectangular containers rather than round ones, as they tend to be more space-efficient.
- Buy in Sets: Purchase container sets rather than individual pieces whenever possible to save money and ensure uniformity.
Pros and Cons:
Pros:
- Reduces cabinet and pantry chaos.
- Allows easy inventory of pantry items.
- Prevents food waste through increased visibility.
- Creates aesthetic coherence in your storage spaces.
- Maximizes storage space through stackable and modular designs.
Cons:
- The initial investment can be expensive.
- Replacement costs can accrue if containers break.
- May require dedicated space for storing empty containers.
- Transferring food from original packaging takes time.
Popularized By: The Home Edit, The Container Store, OXO, and Rubbermaid Brilliance. While no specific website link encompasses all of these, searching for these brands or "clear container organization" will provide ample resources and shopping options.
7. Digital Recipe Management
Reclaim valuable counter and cupboard space by embracing the digital age for your recipe collection. Digital recipe management involves consolidating all your cookbooks, magazine clippings, handwritten notes, and printed recipes into a centralized, searchable digital format. This method drastically reduces physical clutter while simultaneously improving recipe accessibility and organization.
This approach works by leveraging technology to store and organize your recipes. You can utilize dedicated recipe management apps like Paprika, create recipe collections in note-taking apps like Evernote, curate recipe boards on Pinterest, employ digital meal planning services such as Plan to Eat, or even simply organize your recipes within cloud storage platforms like Google Drive. By digitizing your recipes, you create a streamlined system that eliminates paper piles and makes finding your favorite dishes a breeze.
Examples of Successful Implementation:
- Dedicated Recipe Apps (e.g., Paprika): These apps offer features like recipe scaling, ingredient list creation for shopping, and integrated meal planning.
- Evernote: Use tags and notebooks to categorize recipes and create searchable databases.
- Pinterest: While not exclusively for recipes, Pinterest boards can be an effective visual way to organize and discover new recipes. Pinning recipes directly from websites also ensures you always have the latest version.
- Cloud Storage (e.g., Google Drive): Create folders and subfolders to organize recipes by cuisine, meal type, or other categories. This is a simple and cost-effective method for those comfortable with basic file management.
Actionable Tips for Digitizing Your Recipes:
- Scan handwritten family recipes: Preserve precious heirlooms by scanning them and storing them securely in the cloud.
- Photograph cookbook pages: Quickly capture recipes you frequently use without having to manually transcribe them.
- Create consistent tagging systems: Use relevant keywords and categories to easily search and filter your digital recipe collection. (e.g., "vegetarian," "quick meal," "Italian")
- Back up your digital recipe collection regularly: Protect your hard work by backing up your recipes to multiple locations.
- Use a tablet stand in the kitchen: Easily view your recipes while cooking without worrying about spills or splatters.
When and Why to Use Digital Recipe Management:
This method is particularly beneficial for:
- Urban Residents and People in Small Apartments: Maximize limited kitchen space by eliminating bulky cookbooks.
- People Moving: Reduce the amount of physical items to pack and transport.
- People with Clutter: Gain control over overflowing recipe collections.
- Anyone seeking a more efficient and organized cooking experience: Easily search for recipes, scale ingredients, and plan meals.
Pros and Cons:
Pros:
- Reduces physical storage needs significantly.
- Makes recipes easily searchable and accessible from multiple devices.
- Allows for recipe scaling and modifications.
- Preserves family recipes securely.
- Integrates with meal planning and shopping lists.
Cons:
- Initial time investment to digitize the recipe collection.
- Technology learning curve for some.
- Requires a digital backup strategy.
- Can feel less tangible than physical cookbooks, especially for heirloom recipes.
- Vulnerable to technology failures (mitigated by backups).
Digital recipe management earns its place on this list because it offers a powerful solution for taming recipe clutter while simultaneously improving recipe accessibility and organization. By embracing digital tools, you can transform a chaotic pile of recipes into a streamlined and efficient system that empowers you in the kitchen.
8. Drawer Divider Systems
Drawer divider systems offer a highly effective way to conquer kitchen drawer chaos and transform them into organized havens. This approach utilizes customizable dividers and organizers to create designated compartments for every utensil, gadget, and tool, ensuring everything has its place and is easily accessible. Say goodbye to rummaging and hello to a streamlined, efficient kitchen experience.
This solution is particularly valuable for urban residents, people moving, those struggling with clutter, and individuals living in small apartments where maximizing space is crucial. Drawer dividers optimize available space, making even the smallest drawers functional and efficient.
How Drawer Dividers Work:
The core principle is simple: divide and conquer. Instead of a jumbled mess, items are categorized and placed in specifically sized compartments. This prevents shifting and stacking, making it easy to see and grab exactly what you need. Adjustable dividers offer flexibility to accommodate various item sizes and shapes, while custom-fit options provide a truly bespoke solution. Features like stackable inserts maximize vertical space for smaller items, and non-slip materials ensure everything stays put.
Examples of Successful Implementation:
- Joseph Joseph DrawerStore: This compact and expandable system is designed specifically for cutlery and utensils, maximizing space and keeping everything neatly separated.
- Custom Wooden Knife Blocks for Drawers: Protect your knives and keep them organized with a dedicated in-drawer knife block.
- Expandable Bamboo Dividers: These versatile dividers can be adjusted to fit various drawer sizes and are a sustainable option.
- Modular Interlocking Organizers: Create custom configurations to suit your specific needs by combining individual modules.
- Pull-out Drawer Systems with Integrated Dividers: These systems offer maximum accessibility and organization, often featuring tiered compartments and built-in dividers.
Actionable Tips:
- Measure Carefully: Accurate measurements are essential for a proper fit. Measure both the length and width of your drawers, as well as the height.
- Declutter First: Remove any items that don't belong in the kitchen drawers before organizing.
- Group Similar Items: Keep like items together – utensils with utensils, gadgets with gadgets, etc.
- Diagonal Placement: Place long utensils like spatulas and whisks diagonally to maximize space.
- Small Containers: Use small containers or trays to corral tiny items like measuring spoons and bottle openers.
Pros and Cons:
Pros:
- Maximizes drawer space
- Makes items easily visible and accessible
- Prevents damage to sharp tools
- Keeps similar items together
- Reduces time spent searching for items
Cons:
- Can be expensive for fully custom solutions
- May slightly reduce overall capacity compared to a completely empty drawer
- Requires precise measurements
- Some systems are not adjustable after installation
Why Drawer Dividers Deserve a Spot on the List:
Drawer dividers are a game-changer for kitchen organization. They address the common problem of cluttered drawers by providing a structured and efficient storage solution. The benefits extend beyond simple neatness; they improve functionality, save time, and protect your kitchen tools.
Inspiration and Popular Solutions:
Drawer divider systems have been popularized by various retailers and organizing gurus, including The Container Store’s custom drawer solutions, Marie Kondo's drawer organization methods, IKEA's VARIERA series, and Williams-Sonoma kitchen organization tools. These resources offer a wealth of inspiration and pre-made solutions for implementing drawer dividers in your own kitchen.
9. Multifunctional Kitchen Tools
One of the most effective strategies for conquering kitchen clutter is embracing multifunctional tools. This approach prioritizes quality over quantity, focusing on versatile items that perform multiple tasks rather than accumulating single-use gadgets. By selecting tools and appliances with overlapping functionality, you can significantly reduce the number of items cluttering your drawers and cabinets, ultimately simplifying your cooking process and maximizing your kitchen space. This is especially valuable for urban residents, people moving, those living in small apartments, and anyone struggling with kitchen clutter.
How it Works: The core principle is to replace multiple single-use gadgets with one high-quality, multifunctional tool. For example, an Instant Pot can replace a pressure cooker, slow cooker, rice cooker, steamer, and yogurt maker. This consolidation immediately frees up valuable storage space. Similarly, a food processor with various blade attachments can handle chopping, slicing, shredding, and even kneading dough, eliminating the need for separate appliances.
Examples of Successful Implementation:
- Instant Pot: This popular appliance tackles a wide range of cooking methods, consolidating multiple appliances into one.
- Food Processors with Multiple Attachments: A single food processor can replace numerous chopping, slicing, and dicing tools.
- 5-in-1 Kitchen Utensils: These clever tools often combine a spatula, slotted spoon, turner, tongs, and more in one compact design.
- Microplane Tools with Interchangeable Grating Surfaces: From fine zesting to coarse grating, these tools offer versatility in a small package.
- Nesting Mixing Bowl Sets with Measuring Tools Included: This space-saving solution integrates measuring cups and spoons into a nested bowl set.
Actionable Tips:
- Inventory Your Gadgets: Take stock of your existing kitchen tools and honestly assess how frequently you use each one. Identify prime candidates for replacement with multifunctional alternatives.
- Research Highly-Rated Multifunctional Tools: Read reviews and compare features to find durable, high-quality options that suit your cooking needs. Resources like America's Test Kitchen provide in-depth equipment reviews.
- Consider Space Savings When Evaluating Cost: While quality multi-tools may have a higher initial investment, the long-term cost savings from reduced clutter and improved efficiency can make them a worthwhile purchase.
- Test in Store When Possible: If you have the opportunity, try out potential purchases in a store to get a feel for their size, weight, and ease of use.
- Prioritize Frequently-Used Functions: Select tools that excel at the tasks you perform most often in the kitchen.
Pros:
- Reduces the overall number of kitchen items
- Decreases storage requirements
- Often more cost-effective in the long run
- Simplifies cooking processes
- Makes traveling and moving easier
Cons:
- Individual tools may have compromises in specific functions (e.g., a multi-tool knife may not be as sharp as a dedicated chef's knife).
- Higher initial investment for quality multi-tools
- Learning curve to master multiple functions
- May not satisfy specialist cooking needs (e.g., a dedicated pasta maker)
Why This Deserves a Place on the List: In today's increasingly compact living spaces, optimizing kitchen storage is crucial. Multifunctional tools address this directly by consolidating functionality and minimizing clutter. This approach, popularized by figures like Alton Brown with his anti-unitasker stance, and brands like Instant Pot and Joseph Joseph, provides a practical and effective way to streamline any kitchen. This strategy is particularly beneficial for those living in small spaces, preparing for a move, or simply seeking a more organized and efficient cooking experience.
10. Regular Maintenance Schedule
A consistently cluttered kitchen can feel overwhelming and impact your ability to enjoy the space. Rather than tackling massive clean-outs sporadically, a regular maintenance schedule offers a preventative approach to kitchen organization, ensuring clutter doesn't take root in the first place. This method involves establishing a tiered cleaning schedule – daily, weekly, monthly, and seasonally – to distribute the effort and create sustainable habits. This proactive strategy keeps your kitchen functional and clutter-free without resorting to drastic measures. This makes it a valuable tool for urban residents, people moving, those struggling with clutter, and even those in small apartments where space is at a premium.
How it Works:
The core of a regular maintenance schedule lies in its tiered approach. Small, quick tasks are performed daily, while more in-depth cleaning and organization happen less frequently. This prevents clutter from accumulating and makes larger cleaning projects less daunting. The system relies on consistency and discipline, much like FlyLady, Clean Mama, and the principles outlined in The House That Cleans Itself.
Examples of Successful Implementation:
- Daily: Spend 10 minutes clearing and wiping down kitchen counters and the sink area after each meal.
- Weekly: Before grocery shopping, take inventory of your refrigerator, discarding expired items and noting what needs replenishing. This not only reduces food waste but also informs your shopping list and prevents overbuying.
- Monthly: Review the contents of your pantry, checking expiration dates and organizing shelves. This also provides an opportunity to assess your current eating habits and adjust your grocery list accordingly.
- Seasonally: Rotate small appliances based on usage. Store away the ice cream maker in the winter and bring out the slow cooker for fall and winter meals. This maximizes storage space, especially valuable in small apartments.
- Yearly: Conduct a deep cleaning of cabinets, drawers, and appliances. This might include decluttering items you haven't used in the past year.
Actionable Tips:
- Create a Visual Calendar: A visual reminder of your kitchen maintenance tasks can be incredibly helpful. Use a whiteboard, a printable calendar, or a digital calendar app.
- Set Phone Reminders: Use your phone's reminder function to prompt you for daily and weekly tasks.
- Involve All Household Members: Assign age-appropriate chores to everyone in the household to share the responsibility and build good habits.
- Combine with Meal Planning: Integrate your weekly refrigerator inventory check with meal planning for greater efficiency. Knowing what you already have can inspire meal ideas and prevent unnecessary purchases.
- Reward Consistency: Celebrate milestones and reward yourself (and your family) for consistently following the schedule with small treats or activities.
When and Why to Use This Approach:
This approach is ideal for anyone who:
- Feels overwhelmed by kitchen clutter.
- Wants to establish long-term organization habits.
- Prefers preventative cleaning over reactive cleaning.
- Lives in a small space where clutter quickly becomes a problem.
- Is moving and wants to start fresh in their new kitchen.
Pros & Cons:
Pros:
- Prevents major organization breakdowns.
- Distributes effort over time, making it less overwhelming.
- Creates sustainable habits.
- Adapts to changing kitchen needs.
- Reduces the stress of major cleanouts.
Cons:
- Requires consistency and discipline.
- Needs household buy-in for optimal success.
- May feel like constant work initially.
- Requires some degree of calendar management.
This regular maintenance schedule deserves its place on this list because it addresses the root cause of kitchen clutter: lack of consistent upkeep. It empowers you to take control of your kitchen, transforming it into a functional and enjoyable space, regardless of its size or your current clutter situation. By embedding small, manageable tasks into your daily and weekly routines, you'll prevent clutter from building up and maintain a clean and organized kitchen effortlessly.
10-Point Kitchen Clutter Strategies Comparison
Reclaim Your Kitchen, Reclaim Your Peace
From the KonMari Method to vertical storage solutions and the power of drawer dividers, this article has explored a variety of practical strategies to conquer kitchen clutter. The key takeaway is that decluttering isn't just about aesthetics—it's about creating a more functional, enjoyable, and efficient cooking space. By implementing even a few of these techniques—like the one in, one out rule or digitizing your recipes—you can significantly reduce stress and maximize your kitchen's potential, regardless of its size. Mastering these approaches translates to more than just a tidy kitchen; it fosters a sense of calm and control that extends beyond your countertops and into your daily life. A clutter-free kitchen is a happy kitchen, and a happy kitchen is at the heart of a happy home.
For those cherished kitchen items you're not quite ready to part with but seldom use, consider a flexible storage solution like Endless Storage. Their per-box storage option offers a convenient way to free up valuable kitchen space without the hassle of traditional storage units, allowing you to enjoy the benefits of a decluttered kitchen while keeping your belongings safe and accessible. Learn more and reclaim your kitchen space today by visiting Endless Storage.
Frequently Asked Questions
Unveiling the Secrets to Effortless Storage
Endless Storage is available nationwide. You pick a plan, tell us where to pickup, and we'll send a UPS van to collect, whichever state you're in.
Your shipping label will be sent to your email within a few minutes, if not instantaneously. It can also be accessed through your customer profile.
Your box will be shipped to one of our climate controlled self storage facilities in our closest self storage facility. Our manager will accept your package, notify you that your box has been received, and securely stored. Only our managers will have access to Endless Storage boxes.
Email us at admin@endless-storage.com click to live chat with us, or send us a message below.
Never! We're committed to transparent pricing with no surprises. You'll lock in your rate with no hidden fees and no long-term contracts.
Fast access guaranteed! Your boxes will arrive at your doorstep within 48 hours of requesting them back. Need to check on delivery? We provide tracking information for complete peace of mind.
Totally flexible! Store month-to-month with no long-term commitment and cancel anytime.
Everything's online! Use your account dashboard to:
• Set up automatic monthly payments
• Request box returns
• Update your address
• Order additional boxes
• Track shipments
Your boxes are insured up to $100 each. Our customer service team will help you file any necessary claims and resolve issues quickly.
Don't worry – we'll email you right away if there's a payment issue. Your items stay safe, though you may have temporary service interruption or late fees until payment is resolved.
When you request our free storage kits, you'll have 30 days to send in your boxes to activate your 3 months of free storage. Think of it like starting a gym membership – your activation window begins when you receive your kits, and your full free trial begins once you send in your first box. During your free months, you'll experience our complete storage service at no cost.
Your 30-day activation window begins when you receive your storage kits. We'll send you an email confirmation when your kits are delivered, marking the start of your activation period.
If you haven't sent any boxes for storage within your 30-day activation window, your free trial will expire and we'll begin charging the regular monthly rate of $7.99 per box. This helps ensure our storage kits go to customers who are ready to use our service.
A box costs $7.99 per month to store (plus sales tax). This price includes free shipping for standard boxes under 50 lbs. and smaller than 20"x20"x20
Log into your Endless Storage account, locate the box you would like returned, and simply click Return My Box.
Yes, each box stored with us is insured for up to $100 throughout transit as well as the duration of storage within our facilities.
Your box will be at your doorstep within 48 hours of you requesting it back.
Store 10+ boxes? We'll pick them up for free! After your purchase, we'll contact you to schedule a convenient pickup time and arrange UPS collection.
We trust UPS with all shipments, and every box includes $100 insurance coverage. You'll receive tracking information to monitor your items' journey.
Yes! Visit any of our locations by appointment. Just bring a photo ID matching your customer profile.
For everyone's safety, we can't store hazardous materials, firearms, or perishables. All items must fit within our standard boxes.
It's easy! Order your storage kit online, and we'll ship it to you within 1-2 business days. Your shipping labels will be emailed instantly and available in your account.
We're here to help! Email us at admin@endless-storage.com, use our live chat, or send us a message through your account.
To cancel your storage service with Endless Storage, please email your cancellation request to admin@endless-storage.com. Our team will process your request within 2 business days and confirm your cancellation via email.
We understand packing takes time. However, to maintain your free trial benefits, you'll need to send at least one box within the 30-day activation window. If you need more time, you can always start with one box to activate your trial and send the rest later. You can always reach out to admin@endless-storage.com if you have any issues or concerns.
When you request our free storage kits, you're starting a 30-day window to begin using our storage service.
To avoid any charges, simply send at least one box for storage within 30 days to activate your 3-month free trial. If you decide not to use our service and don't send any boxes within the 30-day window, a one-time $50 fee will apply to cover the costs of materials and shipping. This helps ensure our storage kits go to customers who are ready to use our service.
Think of it like reserving a hotel room – we're setting aside space and sending specialized packing materials for your use. The fee only applies if you request materials but don't begin storage, similar to a hotel's no-show charge.